1. useState
2. useEffect userEffect (()=> {},[])일때 초기화 ,[abc] )일때는 abc의 state가 변할때마다 호출.
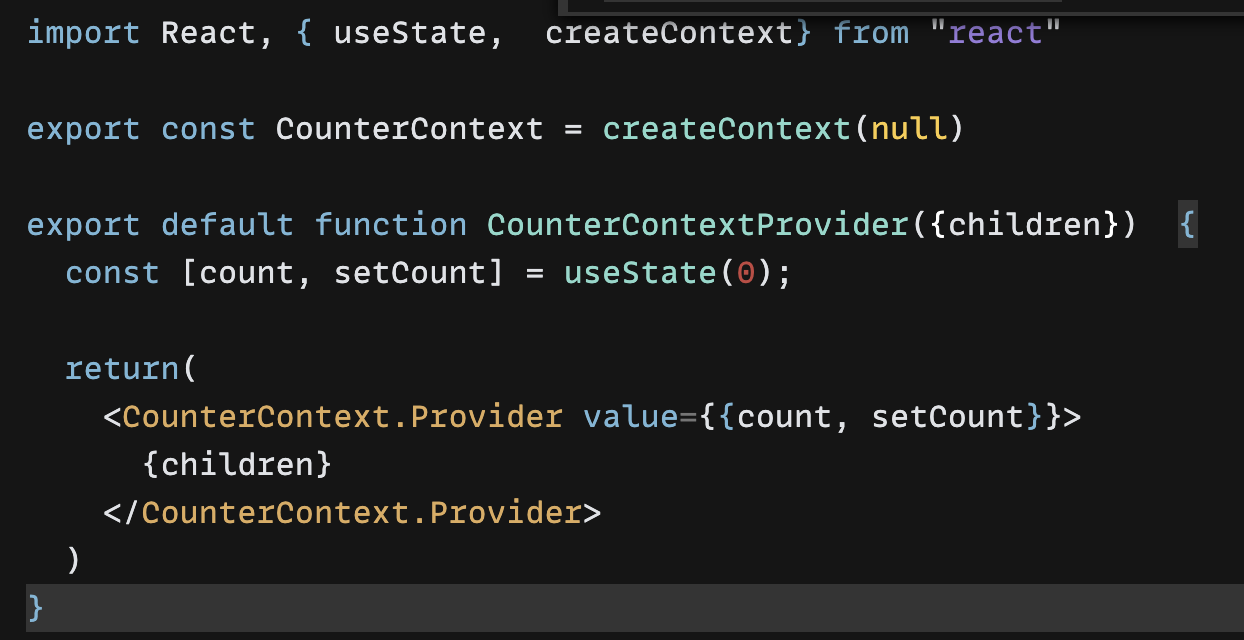
3. useContext : props로 여러번 여러군데 넘기는게 불편할때 약간 global 변수의 개념.
=> Provider 파일을 따로 만들고 children props를 이용하면 특정 컴포넌트만 reload하는 구조로 발전가능하다. (1번방식)
2번 방식도 동작은 하는데 여러개의 childComponent를 사용할때 문제가 될 수 있다. 모두 다 reload 된다.
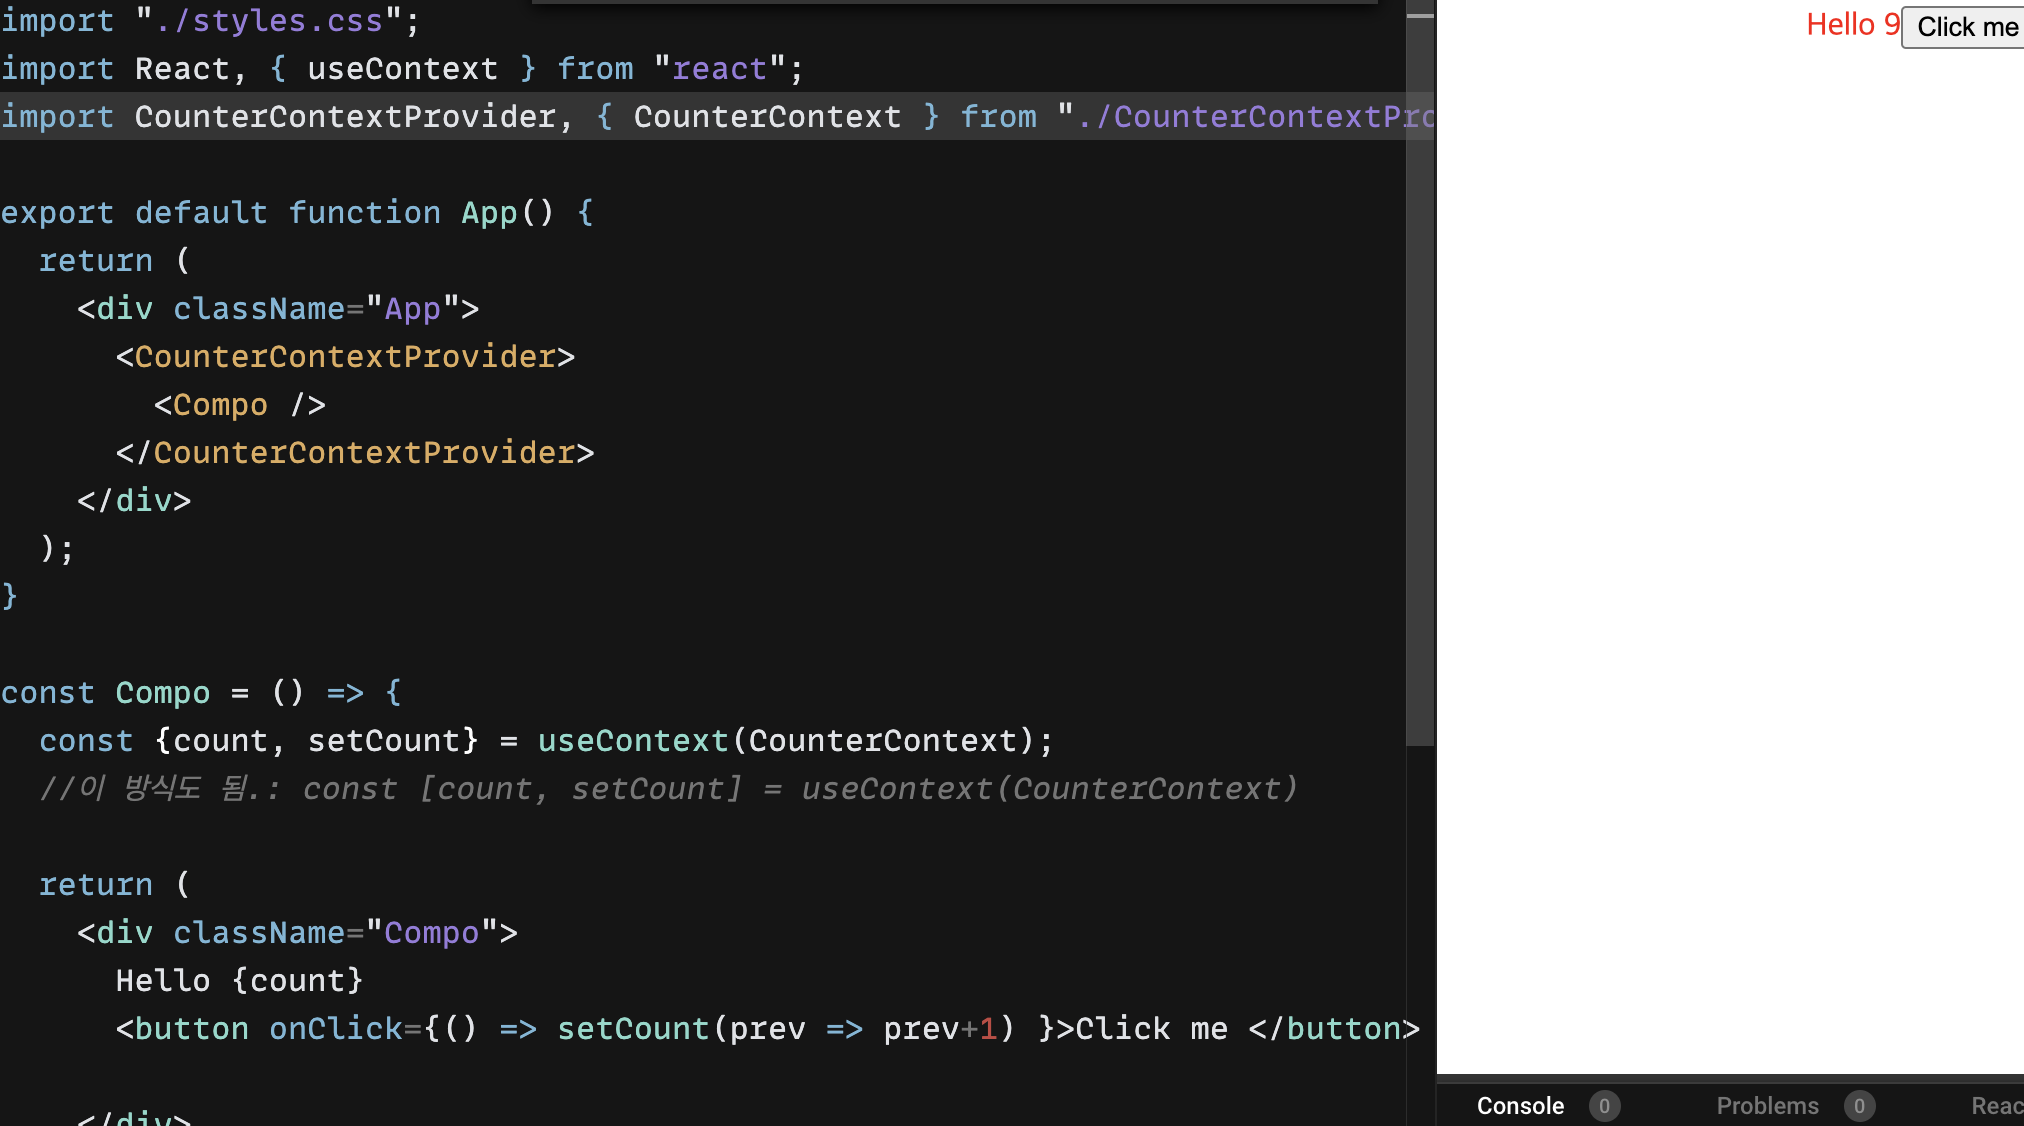
2번 방식;
export const MyContext = useContext({a:1, b:2, 함수});

<MyContext.Privider value = 옵셔널 지정> 예: {value, setValue}
  <ChildComponent>
</MyContext.Provider>

===ChildComponent
const [value,setValue] = useContext(MyContext)
========== Additional Hooks =============
4. useRef input같은 것의 반복적인 state호출 방지용.
const inputRef = useRef(null);
const someFunction = () => {
	console.log(inputRef.current.value) //값이 찍힘. inputRef.current.focus()도 많이 씀.
}

<input type="text" ref={inputRef} />
=> 기존방식 대비 value와, onChange 가 없어도 된다. (값이 바뀔때 마다 뭘 하진 않고, 필요시 전체값만 읽는 경우에 최적)
5. useMemo : cache기능 함수의 return값을 cache해 놓고, state가 바뀔때만 다시 계산함.
6. useCallback: useMemo와 거의 같은데 함수 자체를 cache함.
참고: react-native에서는 useFocusEvent와 결합하여 goBack()으로 이동시에 자동 화면 새로고침에 사용가능.
   useEffect(() => {
        console.log("ConsignDetail consigneeCd", consigneeCd);
        search();

        //아래 H/W키처리 코드 => useCallback으로 대체
        // const backHandler = BackHandler.addEventListener('hardwareBackPress', handleBackPress);
        // return () => backHandler.remove(); // 컴포넌트 언마운트 시 이벤트 핸들러 제거

    }, [consigneeCd, refreshTime]);


    useFocusEffect(
        useCallback(() => {
            // 화면으로 돌아올 때의 처리
            setRefreshTime(Date.now().toString());
            console.log("ConsignDetail화면 진입")
            return () => {
                // 화면이 벗어날 때의 처리
            };
        }, [])
    );
7. useReducer : 몇가지 state를 모아서 한꺼번에 반영. => setState 여러번하는거 보다 효과적.

8. useLayoutEffect : useEffect와 비슷한데, UI를 blocking함, UI용 좌표계산 같은 걸 할때 효과적.
9. useImperativeHandle : forwardRef()와 함께사용해서 자식Component가 부모Component에 메소드 노출.
예제
부모 컴포넌트

    const setPreviewPageNo = (pageNo) => {
        if (refPdfViewer.current) {
            refPdfViewer.current.setPageNo(pageNo);
        }
    };

    <PdfViewer file={docGen.previewUrl}
               onLoadSuccess={(count) => {setPreviewPageCount(count)}}
               ref={refPdfViewer}
    />


 자식 컴포넌트 : setPageNo를 부모에 전달.
 const PdfViewer = forwardRef(({file, onLoadSuccess, showPagination}, _ref) => {

    const [currentPageNo, setCurrentPageNo] = useState(0);

    useImperativeHandle(_ref, () => ({
        setPageNo: (pageNo) => {setCurrentPageNo(pageNo)},
    }));

 }
10. useDebugValue: 리액트 devTool에 state컴포넌트 같은걸 출력. 주로 customHook 안에서 사용.


